
 EN
 ru
 pt
How to Glue PVC Pipe So It Doesn't Leak: Step-by-Step for Beginners
Nov 02, 2026Walk into any hardware store and you will see row after row of plastic pipe and fitting. Cheap, light, and easy to cut — PVC looks like the simplest material on a job site. Yet if you have ever come back to a finished plumbing run and found a slow drip under the sink, you already know the truth: PVC joints rarely leak because the glue was weak. They leak because something in the preparation was rushed.
Solvent cement does not actually "stick" two pieces together the way white glue bonds paper. It softens the outer layer of the pipe and the inner layer of the fitting, so when you push them together the two plastic surfaces flow into each other. As the solvent evaporates, they harden as one continuous piece. Get that sequence right, and a properly made joint can last as long as the pipe itself. Skip a step, and you are inviting a leak a few months down the road.
This guide walks you through the same sequence professional plumbers use, written for someone holding a hacksaw for the first time.
What you need before you start
You do not need a workshop full of tools. Gather these first:
· PVC pipe and the matching socket fittings
· The correct solvent cement for your pipe material (more on this below)
· A fine-tooth saw, a PVC cutter, or a wheel-type pipe cutter
· A utility knife or deburring tool
· A measuring tape and a pencil or marker
· A clean rag or paper towel
· Nitrile gloves, and a well-ventilated space
One habit separates beginners from pros: read the can. Every solvent cement prints its own cure guidance on the label, and those instructions are written for the exact formulation inside. If the can says the joint reaches working strength after a set period under the conditions it lists, treat that number as your deadline, not a suggestion.
Solvent cement and primer are flammable. Keep the can closed when you are not dipping, work away from water heaters, pilot lights and any open flame, and never smoke while gluing.
Step 1 — Cut the pipe square
The single most common cause of weeping joints is a cut that is not square. If the pipe meets the fitting at a slight angle, one side of the socket never gets full contact, and that gap is where water will find its way out.
Mark your cut line clearly. If you are using a hacksaw, keep the blade steady and let it do the work rather than forcing it. A ratchet-style PVC cutter is easier for straight cuts on thinner pipe, and it leaves a cleaner edge. Whatever tool you use, the goal is a flat, perpendicular face with no oval or bevel at the cut end.
Step 2 — Deburr and chamfer
A freshly cut pipe has sharp ridges around the outside and a slightly rough edge on the inside. Those burrs do two things: they scrape some of the wet cement off the pipe as you push it into the fitting, and they leave a lip inside the line that can slow water or catch debris later.
Run a deburring tool or the back of a utility knife around the outer edge until it feels smooth. Knock a light chamfer — a small taper — off the outside of the pipe end. You do not need a long taper; just enough to help the pipe enter the socket without shaving off the cement. Wipe away the plastic shavings. Any dust or shaving left in the joint becomes a weak spot.
Step 3 — Dry fit and mark the insertion depth
Before you open the can, push the pipe into the fitting by hand. It should stop firmly against the shoulder of the socket. This is the depth the joint is designed for.
Mark that depth on the pipe with a pencil or marker. Why does this matter? When you apply cement, the socket becomes slippery and it is easy to push the pipe in too far or, just as bad, not far enough. A depth mark keeps you honest. It also tells you whether the fitting and pipe were a matched set — if the pipe drops in deeper than it should, you may have the wrong fitting, and that is worth catching now rather than after the joint is sealed.
Step 4 — Clean and inspect the surfaces
The joint only works where the plastic is clean and dry. Wipe the outside of the pipe end and the inside of the socket with a dry cloth. If either surface has grease, oil, dirt, or standing water on it, the solvent cannot soften the plastic evenly.
Water is the enemy here. Even a damp pipe wall keeps the solvent from making full contact, and a wet joint will look fine when you finish and start leaking once pressure builds. If the pipe has been lying in puddle water, dry it completely and, if needed, give it time to air out before you glue.
Some systems also call for a primer that prepares the surface and marks the fitting for inspection. Whether you need one depends on your local plumbing code and the product you are using; again, the can and your local code are the authority, not this article.
Step 5 — Apply cement in the right order
This is the step beginners get backwards. Professionals coat the fitting socket first, then the pipe.
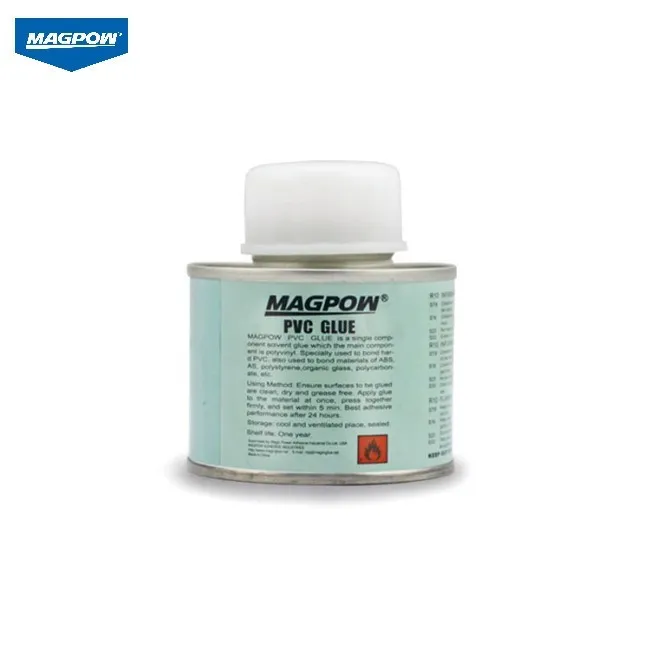
Open the cement and use the applicator that comes in the cap — MAGPOW's 125ml PVC glue, like many plumbers' cements, uses a brush fixed into the lid, which keeps the applicator clean and the can sealed between dips. Apply a full, even layer:
First, a slightly thicker coat on the inside of the socket. Because the socket is harder to reach once the pipe is in, you want to make sure it is well wetted.
Then a thinner, even coat on the outside of the pipe end, out to the depth you marked.
Do not skimp on the coat. Too little cement means the two surfaces barely soften and the joint becomes a surface bond rather than a fused one. Too much is messy and can run inside the pipe. A smooth, wet film covers the whole contact area — that is the target.
Work quickly. The solvent starts to evaporate the moment the can is open, and once the coat begins to feel tacky it has already lost some of its welding ability.
Step 6 — Insert, twist, and hold
Within a few seconds of applying the cement, push the pipe straight into the socket until it reaches the depth mark. As it bottoms out, give it a slight quarter-turn. That small twist spreads the cement evenly across the socket and displaces any thin gaps.
Hold the pipe and fitting together firmly for about 30 seconds until it grabs, then leave it completely undisturbed for 5 to 10 minutes. The joint tries to push itself back out — the solvent is still active, and the plastic wants to expand. If you let go too soon, the pipe can back out a fraction, opening a hairline channel around the joint. Holding it lets the initial set take hold. Do not try to reposition or "adjust" the angle after this point; moving the joint now breaks the surface bond that is forming.
Step 7 — Wipe the excess and let it cure
A bead of squeezed-out cement around the rim is normal. Wipe it away with a rag. Leftover cement sitting on the outside looks untidy, and on a visible run it will yellow over time.
Now the hard part: wait. The joint may feel solid within minutes, but "touch dry" is not "pressure ready." Solvent cement needs time for the solvent to fully leave the plastic and for the fused layer to reach its rated strength. Cure time moves with the weather — cold, damp days slow it down; warm, dry days speed it up. When in doubt, wait longer than the label suggests rather than shorter. Running water or pressure through an under-cured joint is the most reliable way to create a leak that you will not find until the ceiling below has noticed it.
Mistakes that turn a good joint into a future leak
A few habits quietly undo even careful work:
· Using the wrong cement for the material. ABS is a different family — it needs ABS cement, and a PVC solvent will not weld it. PVC and CPVC sit closer together, but CPVC runs hotter, so the cement has to be rated for it. MAGPOW's pipe cement is CPVC-resin based and rated for rigid PVC, UPVC and CPVC, which is why one can covers both. Either way, read the label.
· Gluing in wet conditions. Wet pipe, wet fitting, or a cold drizzly day all give the solvent trouble.
· Forgetting the depth mark. It takes ten seconds and it is the difference between a seated joint and a shallow one.
· Reusing old, half-evaporated cement. Cement that has been sitting open for months is thick and weak. It looks like glue, but it will not weld. When the can has thickened or separated, replace it.
· Applying pressure too soon. Patience during cure is cheaper than cutting out a bad joint later.
Choosing a cement you can rely on
The technique above only works if the cement itself is consistent. For plumbing, drainage, and low-pressure water lines, a solvent-based PVC cement that works across PVC, UPVC, and CPVC pipe is the kind of product professional installers reach for, and the small 125ml brush-in-cap size is a common favorite for repair work and smaller jobs because the built-in applicator means less mess and no separate brush to lose.
MAGPOW manufactures solvent cements and a wider range of industrial adhesives for woodworking, construction, marble processing, leather, footwear, textiles, and civil engineering. With more than three decades of adhesive production behind it and customers in dozens of countries, the company supplies PVC solvent cement in the familiar 125ml brush-top format, with supporting Technical Data Sheets and Safety Data Sheets available for distributors, installers, and brand owners who want consistent product lot to lot. Whether you are a homeowner fixing a drain under the kitchen sink or a supplier building out a plumbing line, the same principle applies: a clean, square, properly prepared joint made with cement you trust is the joint you will not have to come back to.
The bottom line
A leak-free PVC joint is not magic, and it does not depend on an expensive "super glue." It is the result of seven small things done in order: a square cut, a smooth edge, a marked depth, clean and dry surfaces, cement applied to the socket first, a firm push and a short hold, and enough waiting time afterward. Miss one, and you may get away with it for a while. Get all of them right, and the joint will outlast everything else you installed that day.