
 EN
 ru
 pt
How to Use 5-Minute Black and White Epoxy Adhesive for Fast Repairs
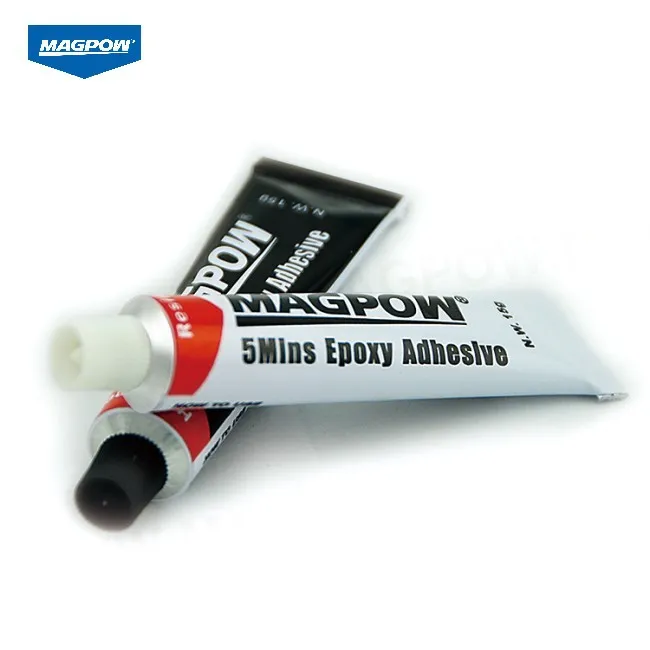
Oct 30, 2026Quick answer. A 5-minute black and white epoxy adhesive is a two-part glue: resin in the white tube, hardener in the black tube. Mix equal amounts, apply, and the joint sets in roughly 5 minutes, reaches handling strength in about 1 hour, and fully cures to maximum strength in 24 hours. It bonds metal, hard materials, automotive spare parts, and crafts, and is commonly chosen for small repairs where you don't want to wait for a slow-curing epoxy.
That's the short version. If you're trying to fix a cracked metal bracket, a loose auto component, or a broken craft piece and want the bond to actually hold—rather than staying soft and falling apart a week later—the details below matter. This guide is based on MAGPOW's MPA102 5 Mins Epoxy Adhesive, but the steps apply to most black-and-white tube epoxies of the same type.
How does black and white epoxy adhesive actually work?
It is a two-part system. Part A (white tube) is the resin; Part B (black tube) is the hardener. Inside the tubes, neither component does anything on its own. Once you squeeze them out together and mix them, a chemical reaction starts and the paste hardens into a rigid bond.
The two contrasting colors serve a practical purpose. While you're mixing, streaks of white or black tell you the blend isn't uniform yet. Stop stirring only when the color is even across the whole mixture. Under-mixing is one of the most common reasons an epoxy repair stays gummy or fails prematurely.
Per the product label, MAGPOW's 5-minute epoxy is solvent-free and can be used on metal and non-ferrous metals, hard materials, automotive spare parts, electronic components, as well as pearls, jade, arts and crafts, and antique restoration. Once cured it resists water, chemical media, and heat, and can be painted or waxed over.
Step 1: Clean the surfaces before the glue goes on
Epoxy bonds to clean material, not to grease. The product label is explicit: clean and dry the surface, removing oil, dirt, and rust first.
In practice:
· Wipe oily or grimy parts with a cloth dampened in rubbing alcohol or a suitable degreaser.
· Scrape or sand away flaking paint, loose rust, and powdery oxidation.
· Let the surface dry completely. Any water film left behind weakens the bond.
A lot of failed epoxy repairs trace back to a surface that looked clean but wasn't. Spend the extra two minutes here.
Step 2: Mix equal parts on a disposable surface
Squeeze out equal lengths from the white and black tubes onto a piece of cardboard, plastic, or a mixing pad. Stir thoroughly until the color is uniform—no marbling, no visible streaks.
Two rules from the label that people ignore:
· Mix only what you can use in one sitting. Once resin and hardener are combined, the leftover paste cannot be stored; it will cure in the pad.
· Recap both tubes tightly right after squeezing. If caps stay off, the contents dry out and the next use is ruined.
Step 3: Apply and hold—you only have about 5 minutes
Spread the mixed epoxy thinly and evenly onto one or both surfaces, then press the parts together firmly. Hold them in place or clamp them while the adhesive sets.
The working window is short. Before you start mixing, line up the parts, position the clamps, and know where everything should end up. Once the mix begins to thicken—usually within about 5 minutes at room temperature—you won't be able to reposition it.
Step 4: Don't load the joint for a full 24 hours
At normal room temperature:
· About 1 hour: the joint reaches usable handling strength. You can carefully move the part without it falling apart.
· About 24 hours: the epoxy reaches its maximum strength.
It's tempting to tug on the repair right after it sets. Resist that. A joint that feels solid at the one-hour mark is nowhere near its final strength, and stressing it early is a common reason the bond cracks later.
Why is my epoxy not hardening? Troubleshooting
If your mix stays soft or rubbery after an hour, one of these is almost always the cause:
1.The two parts weren't mixed evenly. Visible streaks mean sections never properly reacted.
2.The ratio was off. Too much hardener or too little leaves uncured material in the mix.
3.The surface was oily or wet. Epoxy won't bond properly through contamination.
4.The room was cold. Curing slows down noticeably at low temperatures; give it more time and warmth.
5.The tubes are old or were left uncapped. The shelf life on this product is 2 years from the production date, and exposure to air degrades the resin.
Safety basics
Avoid contact with eyes and skin. If epoxy gets on your skin, wipe it off with an alcohol-dampened cloth before it cures, then wash with soap and warm water. If it gets in your eyes, or you feel any irritation, seek medical attention promptly. Keep the tubes out of reach of children.
FAQ
Q: How strong is 5-minute epoxy when it fully cures?
It reaches maximum strength in 24 hours at room temperature. It is designed for small parts and constructive bonding, but it is not a substitute for welding or for joints carrying heavy structural load.
Q: Can I paint over cured epoxy?
Yes. The product label states the cured adhesive can be painted or waxed.
Q: How long does an unopened tube last?
The shelf life is 2 years from the production date, provided the caps are kept tightly closed.
Q: What materials can it bond?
Metal and non-ferrous metals, hard materials, automotive spare parts, electronic components, and craft materials such as pearls, jade, and antiques.
Q: Can I use it outdoors?
Once cured, it resists water, chemical media, and heat. For permanent outdoor structural exposure, evaluate the specific application or contact the manufacturer for product guidance.